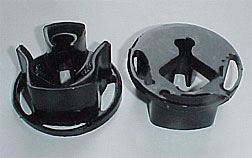
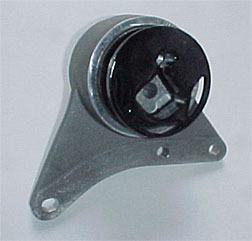
This is what the bracket looks
like for the SRT-4. You will be
removing this from the drivers
side of the car and then pushing
the inserts into it.
One insert goes into one side and one
insert goes into the other side of the
mount. It is basically two halves. |
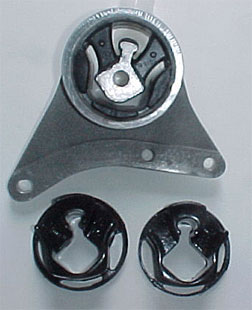 |
This is what the bracket looks
like on the 2.0 liter non-turbo
Neon. It is a little harder to get
out of the car because of the way
the bracket is made. |
 |
ONE:
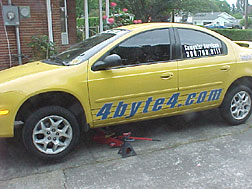
You’ll need to jack up your car,
you can’t use drive up ramps for
this job. Use jack stands for safety.
Put jack stands under frame rails.
|
 |
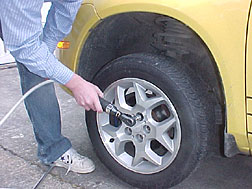
TWO:
Once the car is on jack stands and secure,
remove the drivers side wheel. |
 |
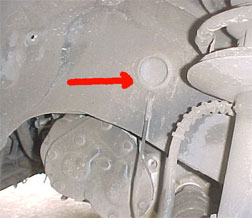
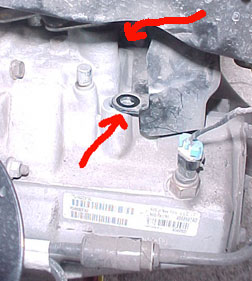
THREE:
Remove the rubber plug shown by the red
arrow, behind it is a bolt you will need to
remove after step Four. |
 |
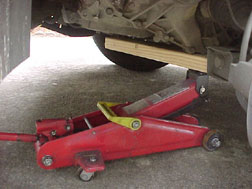
FOUR:
Use a jack and protective item (we used
a 2 by 4) under the transaxle to remove
weight while you remove bolt in step five. |
 |
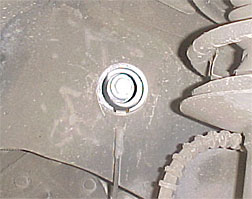
FIVE:
Behind that rubber plug was a bolt, remove
it. Then lower the engine and transaxle to
get to the bolts in step six.
TIP:
Watch it when you lower, as the drive axle
will come down onto the k-frame. You do
not want to damage the axle. |
 |
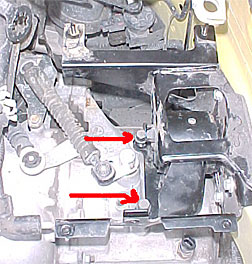
SIX:
There are three bolts to remove the trans
mount bracket on the SRT4 and 4 bolts
on the regular Neon, two shown here on the
side....... |
 |
SEVEN:
..and two on the top. But to get to these two,
you will need to remove the air box and the
battery and the battery tray.
|
 |
Here is a better photo of the two upper
bolts on the 2 liter Neon. |
 |
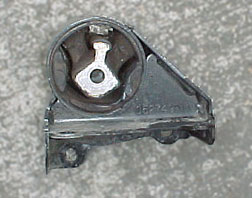
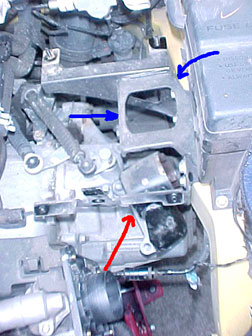
EIGHT:
The red arrow shows the trans mount
bracket that you are trying to remove
so you can install the inserts.
The blue arrows are showing the battery
tray. |
 |
NINE:
Once you have the mount out of the car,
you can slide in the inserts. Here you see
us tapping in the insert, as they do fit snug.
One piece goes into one side, and the other
half goes into the other side. |
 |
TEN:
Step nine shows the regular Neon
mount and insert and this photo shows
the SRT4 mount and insert.
Now re-install the mount bracket, battery
tray, battery and air box.
Make sure all bolts are tight. |
 |